Guide
How to record a GIF of your screen on a Mac
A GIF plays anywhere an image does: a README, a pull request, a help article, a chat thread. macOS can record your screen, but no built-in app saves a GIF directly. This guide covers the closest built-in route, the faster route with Shotnix, how to keep the file small, and when an MP4 is the better choice.
The short answer
- Built in: record with ⌘⇧5, trim in QuickTime Player, then convert the .mov with a shortcut that uses the Make GIF action in the Shortcuts app. It works, with some setup and few quality controls.
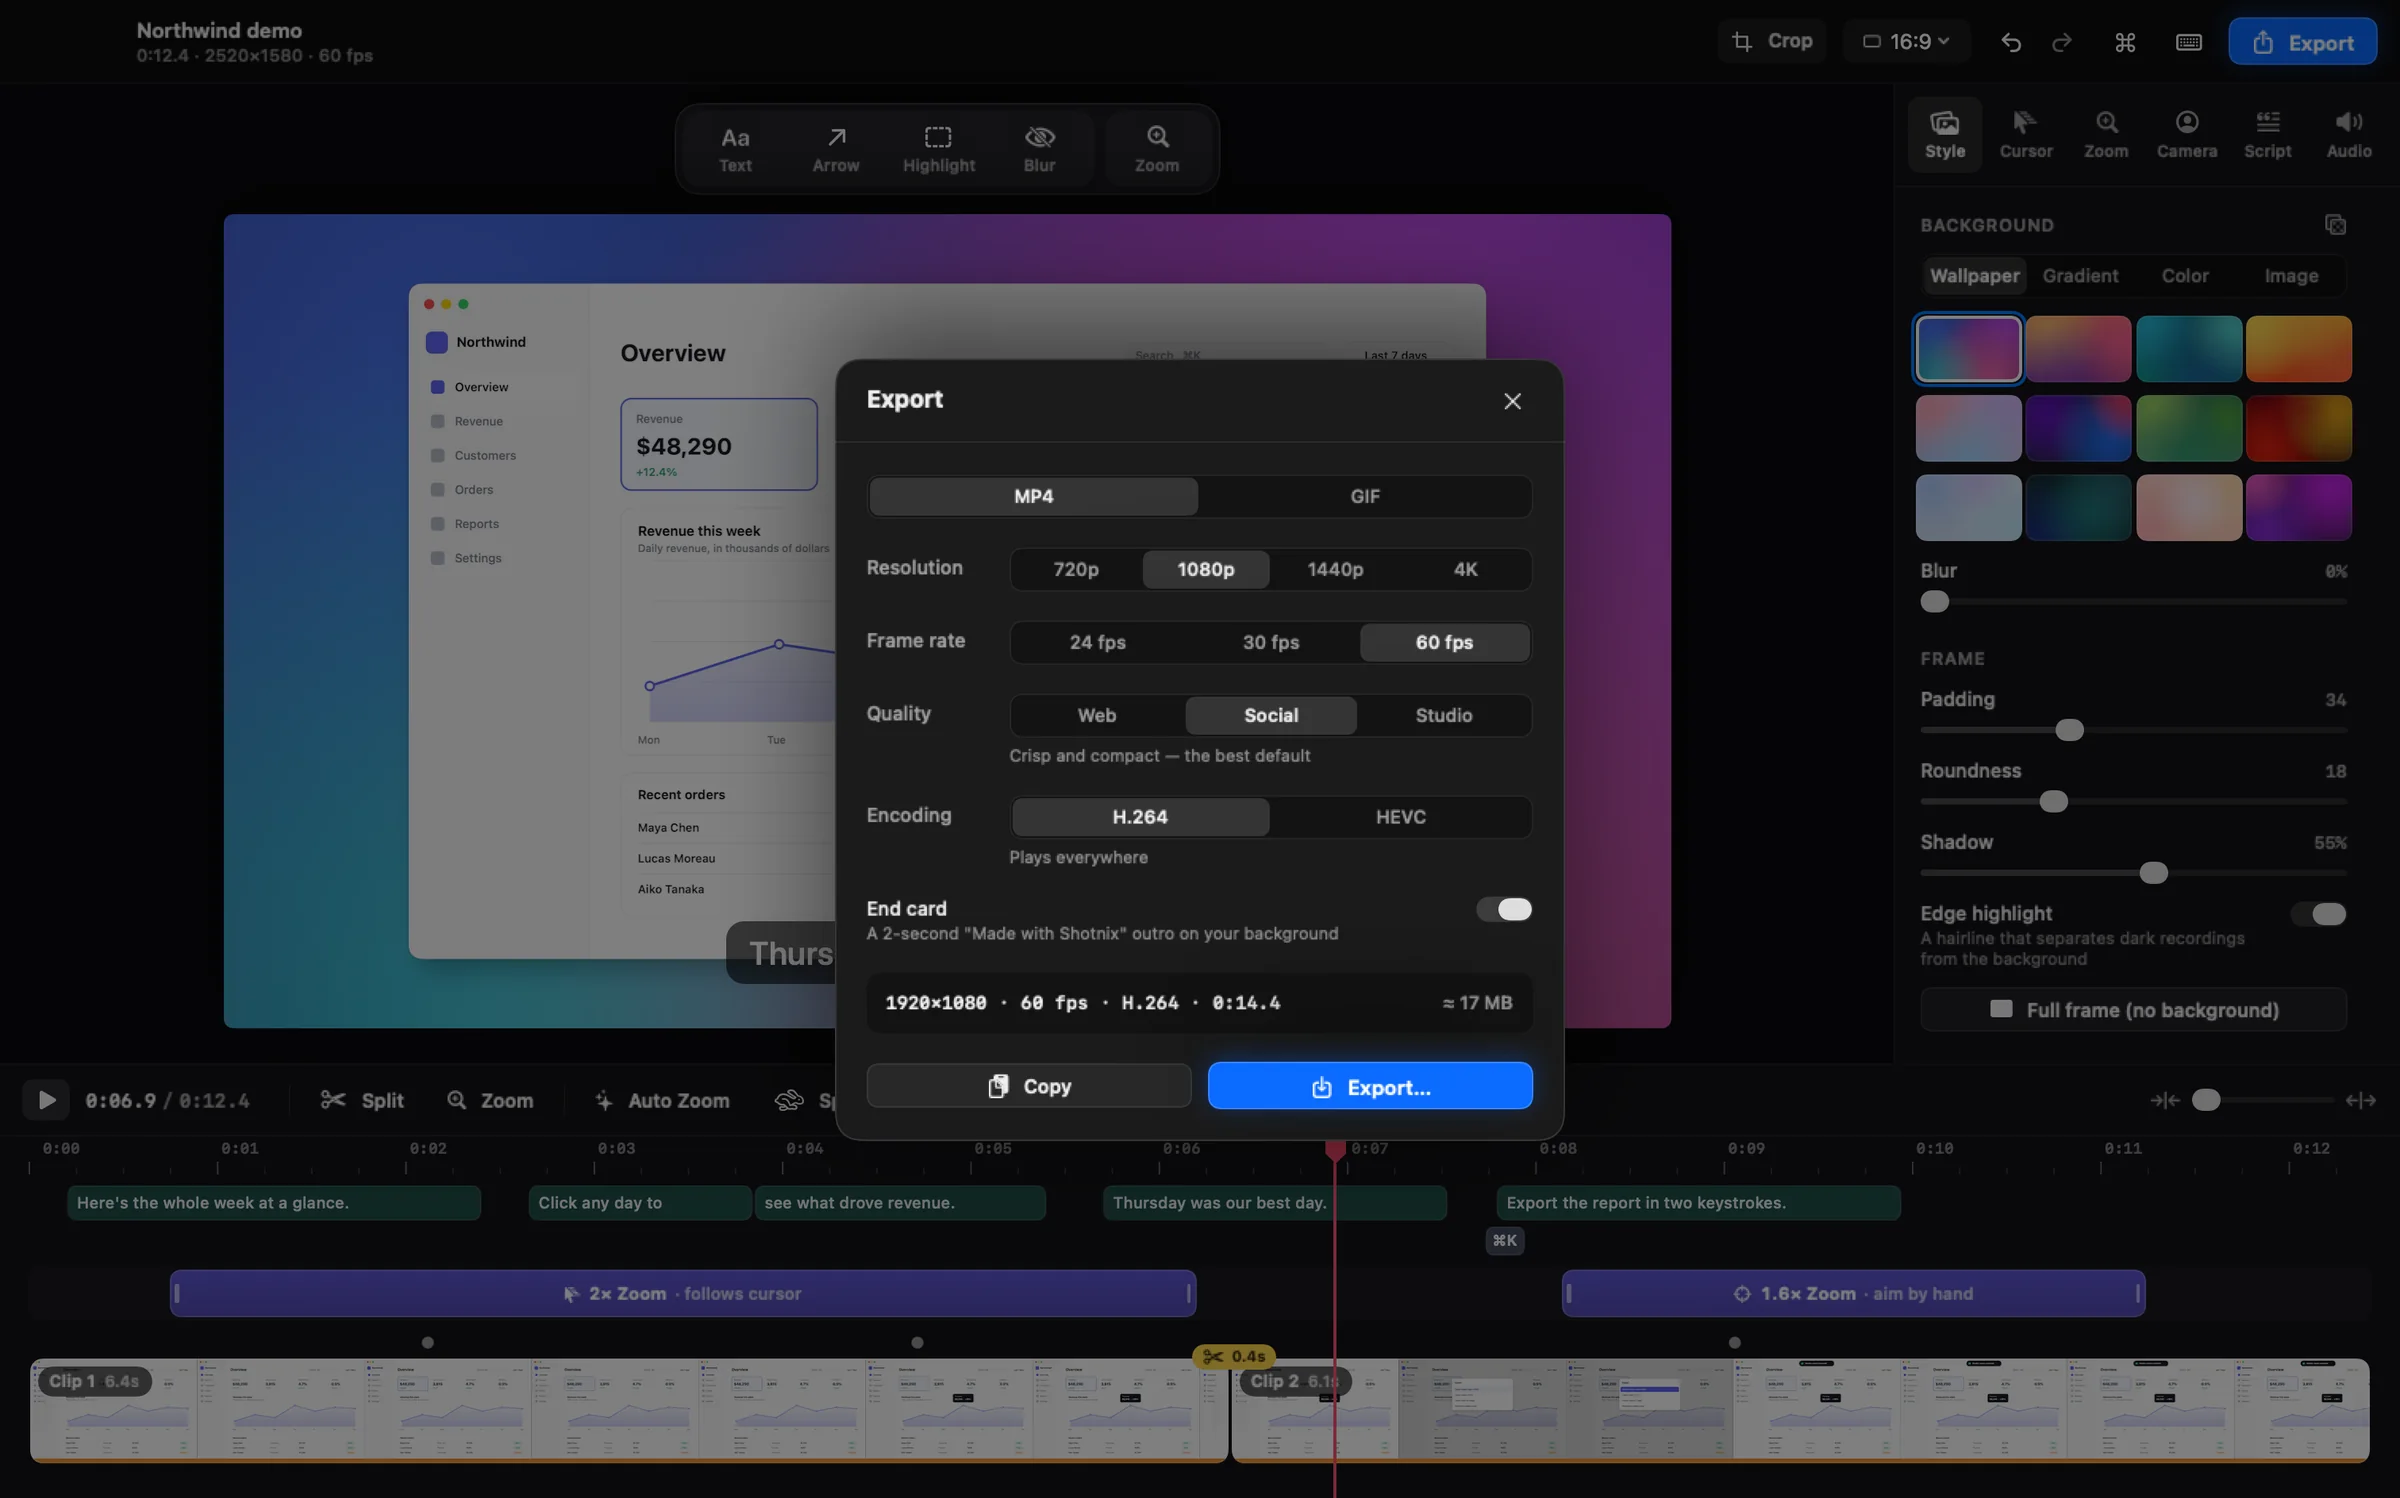
- Shotnix: record, trim in the editor, press ⌘E, choose GIF, pick Small, Medium, or Large and 10 to 24 fps, then save it or copy it straight to the clipboard.
- Keep GIFs to a few seconds. For anything longer, or anything with sound, share an MP4.
Can a Mac make a GIF on its own?
Partly. The Screenshot toolbar (⌘⇧5) records video and saves a .mov file, not a GIF. QuickTime Player, Photos, and iMovie can trim and export video, but none of them turns a video into an animated GIF. Preview opens GIFs; it doesn't make them from video.
The one built-in converter is the Shortcuts app. Its Make GIF action creates an animated GIF from images or a video, so you can build a shortcut once and run it on any recording from Finder.
Method 1: ⌘⇧5, QuickTime Player, and Shortcuts
- Press ⌘⇧5, choose Record Selected Portion, and drag a tight box around what you want to show. A smaller area makes a smaller GIF.
- Click Options and turn on Show Mouse Clicks if you want clicks to be visible, then click Record. Stop with the stop button in the menu bar or ⌃⌘Esc.
- Open the .mov in QuickTime Player, choose Edit → Trim (⌘T), drag the yellow handles around the moment you need, click Trim, then choose File → Save.
- In the Shortcuts app, create a new shortcut, add the Make GIF action, and add a Save File action after it.
- Open the shortcut's details, turn on Use as Quick Action, and select Finder.
- In Finder, Control-click the trimmed video, choose Quick Actions and then your shortcut, and pick where to save the GIF.
Note. Make GIF has only a few settings (Seconds Per Photo, Loop Forever, and Auto Size or a fixed width and height) and no preview, so expect some trial and error, and large files from long or full-screen clips. If another app has taken over ⌘⇧5, open Screenshot from Applications → Utilities instead.
Method 2: Record, edit, and export a GIF with Shotnix
- Click the Shotnix menu bar icon, choose Record Area, and drag a tight box around the part of the screen you want. Leave Microphone off; GIFs have no sound.
- Record the action and stop. The recording opens in the editor, and Auto Zoom has already added a zoom for each burst of clicks, which keeps small text readable. Remove any you don't want.
- Trim the start and end by dragging the clip edges, or press I and O to trim to the playhead. Speed Up Idle fast-forwards stretches where nothing happens.
- Add an arrow, a text label, or a blur over private details if the GIF needs one.
- Press ⌘E and choose GIF. Pick a size (Small, Medium, or Large) and a frame rate (10, 15, 20, or 24 fps). The sheet shows the pixel size and an estimated file size before you export.
- Click Export to save the file, or Copy to render it and put it on the clipboard, ready to paste into a chat or an email.
Note. Shotnix doesn't record straight to GIF: you record a normal video, which you can edit, and GIF is one of the export formats. That also means any existing video, including a .mov from ⌘⇧5, can become a GIF. Open it with Open With → Shotnix in Finder and export.
How to keep a GIF small
A GIF is a stack of images, one per frame, each limited to 256 colors. Length, size, and frame rate multiply, so cutting any of them shrinks the file.
- Keep it short. At 15 fps, every second adds 15 frames. A loop of three to eight seconds is enough for most interface demos.
- Record less of the screen. A tight box around one panel beats a full display scaled down, and the text stays larger.
- Lower the frame rate. 10 to 15 fps is smooth enough for clicks, menus, and typing; save 20 to 24 fps for scrolling and animation.
- Choose the smallest size that keeps text readable. Medium is a sensible default, Small suits a single button or a chat thread, and Large is for fine print.
- Simplify the picture. Gradients, photos, and blurred wallpapers turn into banding and noise at 256 colors, and they bloat the file. A solid background, or Full frame with no background at all, stays crisp.
- Check the destination's limit. GitHub, for example, accepts GIF attachments up to 10 MB.
When an MP4 is the better choice
GIF dates from 1987: 256 colors, no sound, and weak compression. An MP4 of the same clip has full color and audio and is usually a fraction of the size. Choose MP4 when:
- The clip runs longer than about 15 seconds.
- It has narration or sound.
- It shows video, photos, or smooth gradients.
- The destination plays video inline anyway, as Slack and GitHub do. GitHub accepts MP4, MOV, and WebM attachments.
Note. Shotnix exports both formats from the same edit, and Copy works for either, so pasting an MP4 into a chat is as quick as pasting a GIF.
Questions
Can you record a GIF directly on a Mac?
Not with the built-in tools: the Screenshot toolbar records .mov video. Convert the video with a shortcut that uses the Make GIF action, or use an app that exports GIFs. Shotnix records a video and exports it as a GIF from its editor.
How do I convert a screen recording to a GIF on a Mac?
Build a shortcut in the Shortcuts app with the Make GIF action and run it from Finder's Quick Actions menu. Or open the recording in Shotnix with Open With in Finder, press ⌘E, and choose GIF.
Why is my GIF file so big?
A GIF stores one image per frame with at most 256 colors, and it compresses poorly. Trim it, record a smaller area, choose a smaller size, and use 10 to 15 fps.
What frame rate should a GIF be?
10 to 15 fps for clicks, menus, and typing; up to 24 fps for scrolling or animation. Higher frame rates mostly add file size.
Do GIFs have sound?
No. GIF is an image format and can't carry audio. Export an MP4 when the sound matters.
How do I add a GIF to a GitHub README?
Drag the GIF into an issue or pull request comment on GitHub. It uploads (up to 10 MB) and inserts the Markdown, which you can copy into the README. Or commit the GIF to the repository and reference it with standard Markdown image syntax.
Try it on your own screen.
Shotnix is free, open source, and local, with no watermark. Download the notarized app, or star the repository to follow along.
11.7 MB · Apple silicon (M1 or later) · macOS 13+ · notarized by Apple · MIT license