Auto zoom
Auto zoom for screen recordings, following your cursor.
On a phone or in a small player, a full-screen recording turns every button into a speck. Zooming in on a screen recording fixes that, but placing each zoom by hand takes longer than recording did. Shotnix saves your pointer and clicks with the video, so the recording opens with a zoom on each burst of clicks, already following your cursor. You change the ones you want and keep the rest.
ZAdd a zoom at the playhead
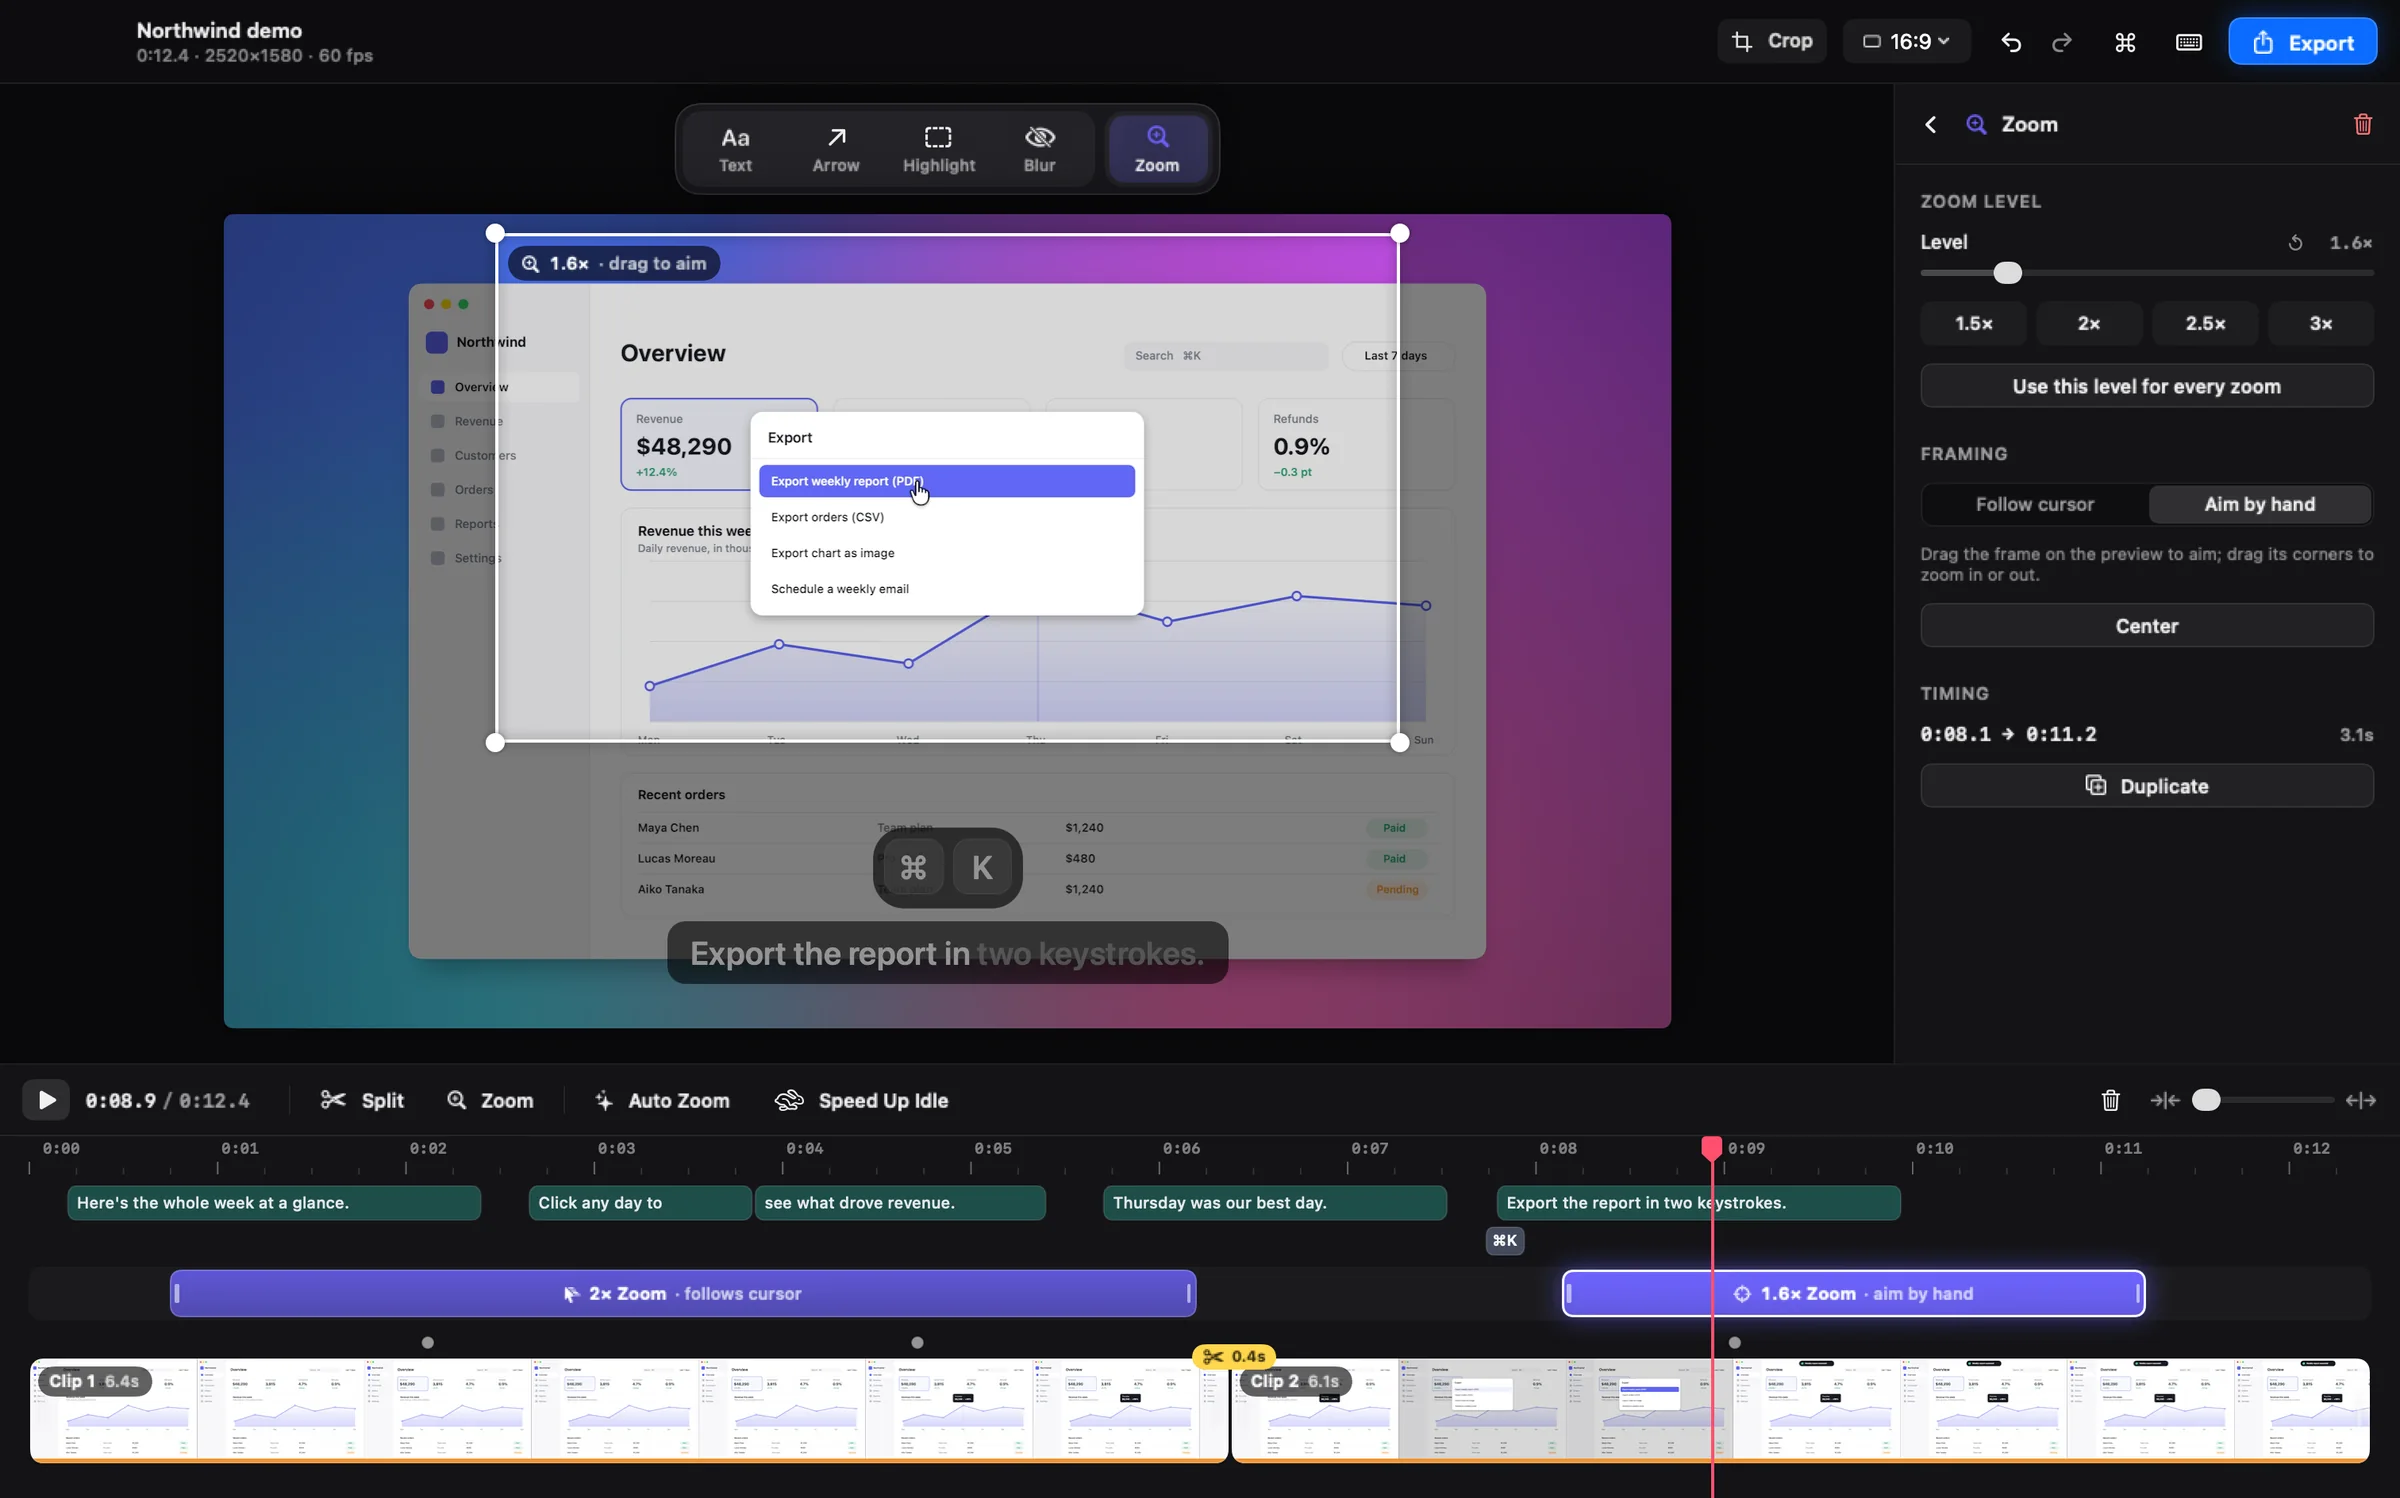
How auto zoom works on a Mac screen recording
While you record, Shotnix saves the pointer's path and every click as data next to the video (Settings → Recording → Editable cursor, on by default). When you stop, the editor opens with Auto Zoom already applied: each burst of clicks gets its own zoom, timed so the view arrives before you click instead of chasing it.
Between clicks, the view follows your cursor. Zooms that sit close together chain into one smooth pan instead of zooming out and back in. You can run Auto Zoom again at any time from the Zoom tab, and it keeps the zooms you placed by hand.
Zoom that follows the cursor, or aim it by hand
Each zoom has two framing modes. Follow cursor keeps the pointer in view and glides after it, which suits filling in a form, dragging something across the screen, or working through menus.
Aim by hand shows the whole frame with a target rectangle you drag on the preview. Use it for a chart, a line of code, or anything the cursor isn't pointing at.
Zooms are blocks on the timeline
- Press Z, or click the Zoom track, to add a zoom at the playhead.
- Drag a block to move it. Drag an edge to make it longer or shorter.
- Levels go up to 4×, with presets at 1.5×, 2×, 2.5×, and 3×. With a zoom selected, keys 1 to 5 set its level.
- Choose how the view moves: Slow, Smooth, Quick, or Instant, with adjustable motion blur like a real camera.
Tips for zooms that help
- Most demos read well between 1.5× and 2×. The deeper the zoom, the fewer recorded pixels fill the frame, so save 3× and 4× for small details.
- Move the pointer calmly. A follow zoom glides after it, so a steady hand makes a steady video. Cursor smoothing in the Cursor tab helps too.
- Want the view to pull back between two steps? Leave a gap between their blocks. Blocks that nearly touch become one continuous pan.
- Recording with your camera? The bubble can shrink out of the way during zooms.
Zooming in with built-in Mac apps
The built-in recorder doesn't add zooms. In iMovie, you can split the clip where a zoom should start and end, then apply Crop to Fill or the Ken Burns effect to that piece. It works for a few fixed zooms, but iMovie doesn't know where your cursor is, so a zoom can't follow it, and each one takes several manual steps.
What auto zoom needs
- Auto Zoom and Follow cursor use the pointer and click data Shotnix records. A video from another app opens without automatic zooms; add zooms with Z and aim them by hand.
- Auto Zoom plans zooms from clicks. A recording with no clicks gets no automatic zooms, so add them yourself.
- Shotnix runs on Apple silicon Macs (M1 or later) with macOS 13 or newer.
How to do it in Shotnix
- Record with ShotnixRecord an area, a window, or a display. Editable cursor is on by default, so your pointer and clicks are saved with the video.
- Stop, and the editor opens zoomedEach burst of clicks already has a zoom that follows your cursor.
- Adjust the zoomsDrag blocks to move them, drag edges to change their length, and press Z to add one at the playhead.
- Choose how each zoom frames the screenIn the Zoom tab, pick Follow cursor or Aim by hand. To aim, drag the target rectangle on the preview.
- ExportPress ⌘E. The file matches the preview exactly.
Questions
How do I zoom in on a screen recording on Mac?
Open the recording in Shotnix and press Z, or click the Zoom track, to add a zoom at the playhead. Drag it to the right moment and length, then pick Follow cursor or Aim by hand. Fresh Shotnix recordings already have a zoom on each burst of clicks.
Can the zoom follow my cursor automatically?
Yes. A zoom set to Follow cursor keeps the pointer in view and glides after it. It uses the pointer path Shotnix saves while you record, so it works on Shotnix recordings.
Do I zoom while recording or afterwards?
Afterwards. You record normally and every zoom lives in the editor, so you can move, stretch, or delete any of them before you export. Nothing is baked into the recording.
Does auto zoom work on videos from other apps?
Not automatically. Auto Zoom needs the click data Shotnix saves during recording. You can still add zooms to any video with Z and aim them by hand.
How far can I zoom in on a screen recording?
Up to 4×. The presets are 1.5×, 2×, 2.5×, and 3×. Most demos read best between 1.5× and 2×.
Will running Auto Zoom again remove my own zooms?
No. Re-running Auto Zoom keeps the zooms you placed by hand. Undo covers every change either way.
Try it on your own screen.
Shotnix is free, open source, and local, with no watermark. Download the notarized app, or star the repository to follow along.
11.7 MB · Apple silicon (M1 or later) · macOS 13+ · notarized by Apple · MIT license